When to install Bitvise SSH Client?
Install Bitvise SSH Client if:
- You wish to connect from a Windows computer to a remote SSH or SFTP server.
- The server you connect to does not have to run Bitvise SSH Server. Our SSH Client can connect to most any SSH or SFTP server.
- However, a server has to exist, and you need to have access information for this server.
- Bitvise does not provide servers to connect to. If you were not provided information by someone to access their SSH server, you will need to set up your own server.
The SSH Client runs on desktop and server versions of Windows:
- We target all x86 and x64 desktop and server editions of Windows that are in support by Microsoft.
- We additionally support Windows XP and Windows Server 2003.
The focus of this guide is to demonstrate use of Bitvise SSH Client as part of setting up and accessing Bitvise SSH Server. Aspects of this guide may also apply to use of the SSH Client with other servers.
Where to install the SSH Client?
If you are installing the SSH Client as part of setting up Bitvise SSH Server:
Install it first on the same computer where the SSH Server is installed.
It normally does not make sense to connect to an SSH server on the same computer. However, if you are setting up an SSH server, ensuring that it can be accessed from the same computer is an important step in verifying that it works.
Subsequently, install the SSH Client on another computer in the same LAN. Use this installation to verify that the SSH Server can be accessed from another computer in its local area network.
Finally, install the SSH Client on the computer from which you want to access the SSH Server. This can be a computer across the internet.
Download the SSH Client
To install the SSH Client, you first need to download it. We recommend always downloading the latest version of the SSH Client from our website, as follows:
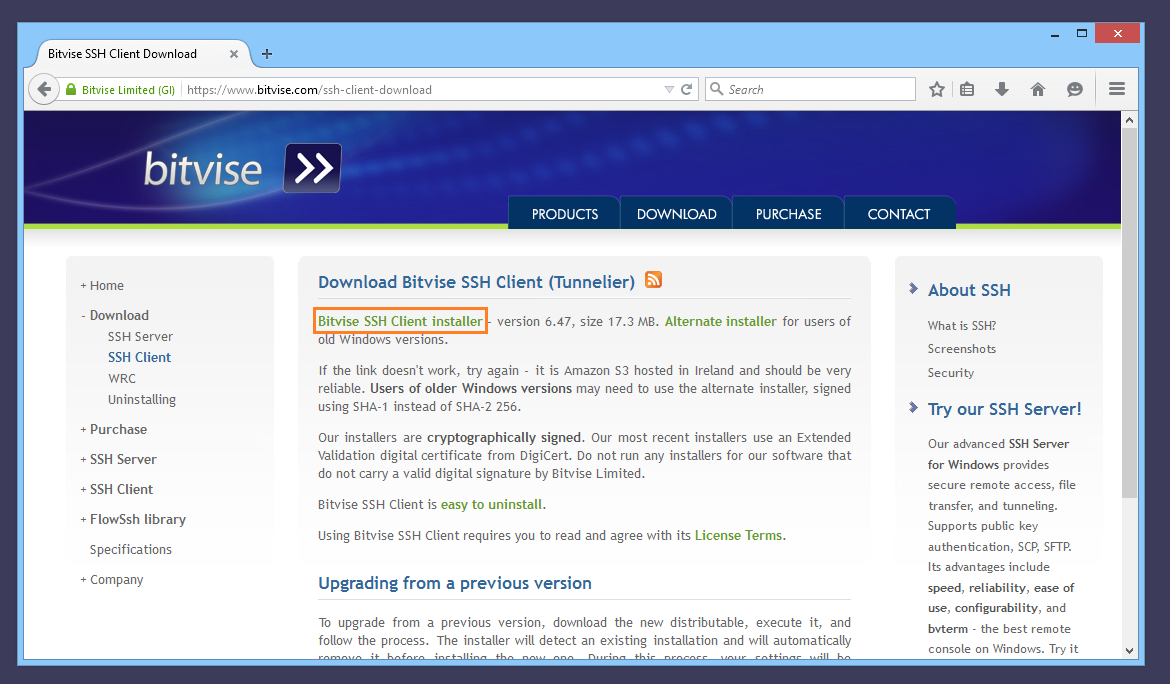
Open the SSH Client download page and download the installer.
Do not use older versions if you can avoid it. They may contain known security, compatibility, and reliability issues fixed in later versions.
For information about changes in SSH Client versions, consult the SSH Client version history.
Run the installer
The process of downloading and starting the SSH Client installer is largely identical as when installing Bitvise SSH Server:
- You will need to be logged into Windows with administrative permissions to run the SSH Client installer.
- Before approving it to run, verify Bitvise's signature on the SSH Client installer.
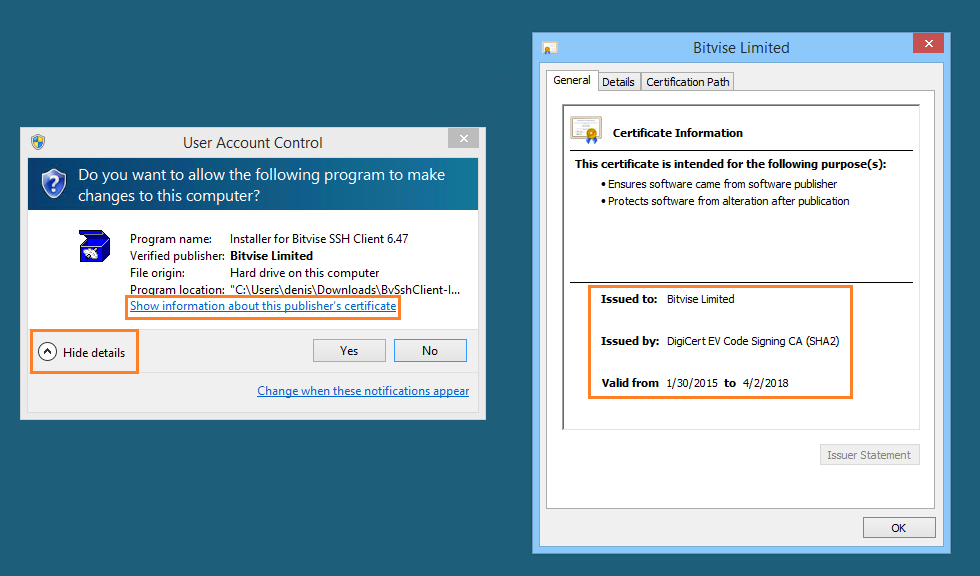
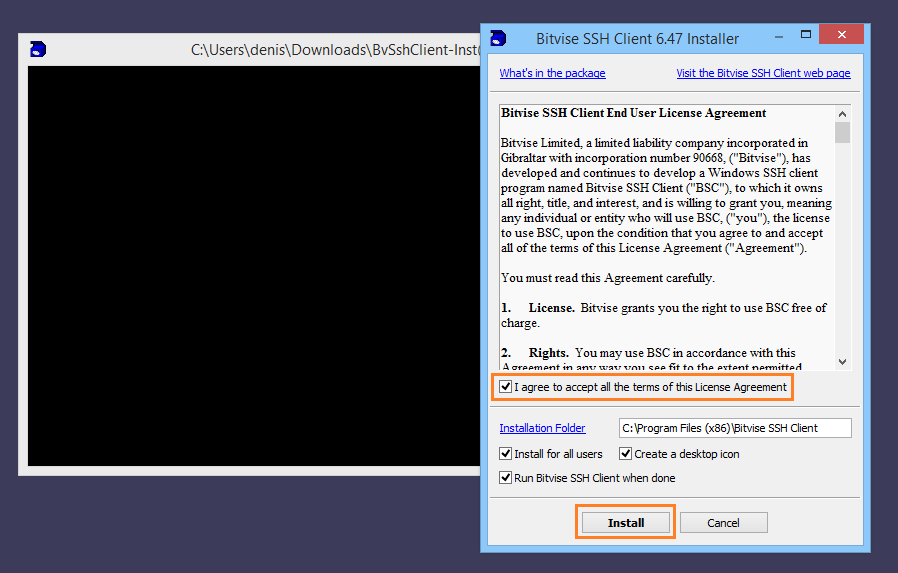
If you have approved to run the installer, the installer interface will appear.
- Review the End User License Agreement. You must accept the agreement to continue installation.
- No other action is required at this step.
- The black console window will show technical details of the installation, including information about any problems if they occur.
Advanced installation
The SSH Client installer can also be run from the command line, to perform an installation unattended. Run the installer with suitable command line parameters in this case. For help with supported parameters, run the installer as follows:
BvSshClient-Inst -?
Running the SSH Client
After installation, you can run the graphical SSH Client as follows:
- From the Windows Start menu.
- By double-clicking its desktop icon (if you chose to create one during installation).
- By double-clicking an SSH Client profile: a file with a .tlp or .bscp extension.
Once you start it, you can of course also pin the SSH Client to your Windows task bar.
Notification area icon
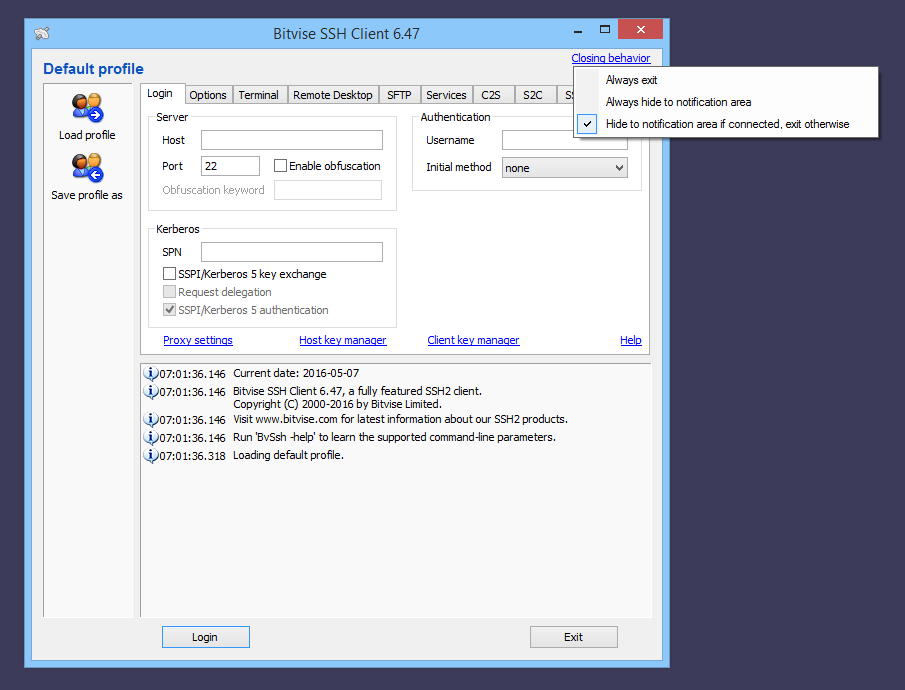
When you close the graphical SSH Client via the X icon when it is connected, it will by default not exit, but instead minimize to the notification area in your task bar:

If your notification area icons are hidden, you may not notice that you already have numerous SSH Client sessions active.
If you prefer, you can change this behavior by setting Closing behavior differently:
Command line clients
After installation, you can also use a Windows Command Prompt or PowerShell window to invoke a number of command line clients included with Bitvise SSH Client:
- Use sftpc for command-line file transfers.
- Use sexec for remote command execution.
- Use stnlc for unattended port forwarding/tunneling.
- Use stermc for a command-line SSH terminal client.
- Use spksc for command-line management of authentication keypairs configured for a user at an SSH server.
PowerShell scripting
Bitvise SSH Client includes FlowSshNet, our SSH library for .NET, which can be used to initiate SSH sessions and SFTP file transfers from PowerShell or .NET. In the SSH Client installation directory, look for a subdirectory named FlowSshNetSamples to find sample PowerShell scripts. The usual location is:
C:\Program Files (x86)\Bitvise SSH Client\FlowSshNetSamples